
8-step guide to DIY your trademark application

Disclaimer: I am not a lawyer or legal expert, and this post does NOT constitute legal advice.
This week, I submitted a trademark application for the second time in my business. The first time was for my Eule Planner®, and this time, it is for my business name, Calm Business. Anything to do with trademarks and copyrights and such can feel very intimidating, but I have found that often, we can do things ourselves if we just take the time to read and understand all the small print. Mind you, if you have a complex business in a competitive industry, then I definitely recommend seeking proper help from a legal professional.
I have a reasonably simple online business: I sell online courses, digital workbooks, and an analog planner. So, I thought I’d share the steps I undertook to apply for a trademark here in the U.S.; even if your business is likely different, this might still be helpful if you’re also a solopreneur.
What is a trademark?
Let’s start with the basics: a trademark is a unique symbol or phrase that identifies your product or service and distinguishes you from your competitors. According to the USPTO website, “The word trademark can refer to both trademarks and service marks. A trademark is used for goods, while a service mark is used for services. A trademark identifies the source of your goods or services, provides legal protection for your brand, and helps you guard against counterfeiting and fraud.”
Having a trademark does not mean that you legally own a word or phrase, and you cannot prevent others from using it. However, with a trademark, you secure your rights to use a word or phrase with your specific products or services, and someone else in the same industry with similar products cannot use your trademarked word or phrase for theirs.
How much does it cost?
The cost depends on which filing option you choose and how many classes you register. Fees start at $250 per class. See Step 5 for more details.
Step 1
Build a strong brand and products around your anticipated trademark
This is really important because the purpose of a trademark, amongst others, is to protect you from intellectual property theft and to avoid confusion among customers. For instance, I’ve been building a brand around Calm Business for the last three years, starting with the launch of the Calm Business Review in 2021 and eventually making my pivot towards offering platform-independent Calm Business courses. I built a new website and got a new domain name that reflects my brand.
Step 2
Start using the ™ symbol with your trademark name.
Trademarks identify services or goods, and by using the ™ symbol, you indicate that you are in the process of registering your trademark. Typically, you use ™ for goods and ℠ services. Once your trademark is registered, you change it to the ® symbol. I am using ™ because my courses and workbooks are products rather than services.
Step 3
Search the USPTO database → Click here

This is to make sure no one has already registered your name or phrase in the same industry. Depending on your word or phrase, you will potentially get a lot of results! The most important things to look for are the industry someone is in and the Goods & Services and Classes used. Tip: unselect the ‘Dead’ filter on the left to narrow down results. You will also see a lot of logos that companies are registering with their wordmarks.
If anyone else in your industry is already using your word or phrase for similar products, you will have to dig deeper and evaluate the conflict of interest. Look at the classes they are using and the descriptions of the goods and products. For instance, if you both sell essential oils and use the same business name, then you may have to find a different name.
If you are not sure about this, or feel overwhelmed by this step, then this would be a good case for talking to a legal professional who specializes in trademarks.
If there is no conflict with an existing trademark, proceed to the next step.
Step 4
Create your account with USPTO
☞ Before you even start, I highly recommend reading the USPTO trademark basics first. In fact, I highly recommend reading all the fine print, watching some of the videos they provide, and taking your time as you go through the application. The USPTO forms are cluttered and not easy to read, so go slowly and be thorough.
Start here:
Verify your identity. You can do this online as part of the account creation, the system will take you through the steps, using the ID.me service. If you don’t want to do this online, there are other options explained in this link. I did the online verification, and it was quick and easy.
TOP TIP: When you create your account, use a dedicated email address just for this. Once your application is in the USPTO system, which is public, you will get inundated with emails from lawyers and scammers offering their services or even scaring you into hiring them. This will eventually subside, but you have been warned!
Step 5
Choose your filing option
There are two filing options; to learn more about each, please click here.
TEAS Plus - $250 per class of goods/services
TEAS Standard - $350 per class of goods/services
With TEAS Plus, you pay all fees upfront and have to make sure you do everything correctly. If you miss something or make a mistake, your filing method will revert to TEAS Standard, and you will have to pay the $100 difference. This happened to me when I applied for the Eule Planner® trademark. I had forgotten to provide a translation for the German word “Eule.” So I had to pay $100 and also wait longer as standard applications are processed more slowly. But we did get there in the end!
For my current application, I have two classes: one for my downloadable, printable workbooks and another for my online courses. I chose TEAS Plus again, so I had to pay $500.
Step 6
Things to have ready
Before you start the actual application process, make sure you have a few things in place.
Search the ID manual for your respective goods or services. You may have to try different phrases to get the right results. In my case, I searched for “workbook” and “online courses” and am using classes 009 and 041.
Make a note of the Class and the Term ID so that you can easily find them again later when you go through the actual application. A class can have multiple entries; select those that apply.
Know your filing basis. This is the legal reason why you should be allowed to register a trademark. There are four different filing bases, but we only need to focus on two here:
1(a) - Use in commerce basis. You are currently using your mark in commerce with your goods and/or services.
1(b) Intent-to-use basis. You have a bona fide intention to use your mark in commerce with your goods and/or services in the near future.
In my case, I chose 1(a) as I am already using the mark.
Create your specimens. A specimen is a sample of your trademark as it is used in commerce. It’s basically the evidence that you have a legitimate product and trademark. Specimens can be photos, PDF, video or audio files. In my case, I took screenshots of my sales and other relevant website pages and created a PDF for each. You can also submit URLs to support your specimen. JPG’s can be up to 5MB, and PDF, audio or video files up to 30MB. Click here for more info on formatting requirements.
Create a description for each specimen. I don’t think this needs to be long, you certainly only get a tiny box to write in. But still good to have something prepared.
Step 7
Start your application
Click here and click on “Start your application in TEAS” to get started. You will be asked to log in if you’re logged out.
I recommend putting aside 2-4 hours for this; it all depends on how well you prepared in Step 6. You can save a TEAS form to complete later, but that doesn’t look like a super straightforward process, and I recommend going into this well-prepared and doing it in one session.
As I mentioned before, the most important thing is to read everything thoroughly as you go through the form. If you do that, and also make use of the help links, you’ll be fine.
Step 8
Pay, submit, and wait
Once you have completed the application, you will be asked to pay, and then you can complete this process and submit everything. You will get an email with a copy of your application and lots of information, it’s very good actually.
And now you wait.
You will get a lot of spam emails from lawyers and probably scammers, too, who will tell you that you cannot possibly do this without them. Which in some cases is probably true but I would certainly not hire any of those!
As of writing this post, the wait time at USPTO is many months. You can check the wait times here.
Need more help?
Take a course
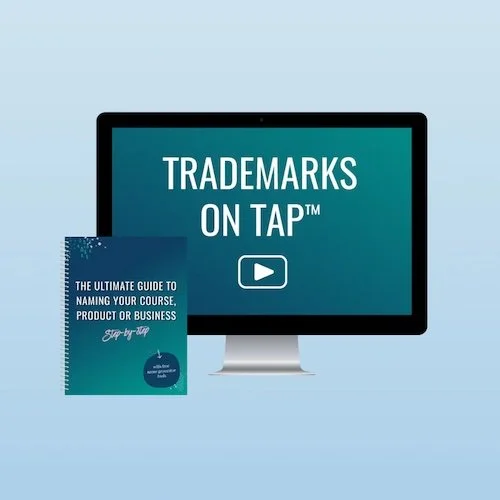
Trademarks on Tap
I am a happy affiliate of the Contract Shop, and they have an awesome-looking course for trademarks. Great value if you’d rather be guided by a professional but don’t have the budget for an attorney.
☞ Trademarks on Tap (affiliate link)
Hire an attorney
Depending on the complexity of your business or your comfort level with DIY-ing, you may prefer to put this in the hands of a legal professional. Here are two attorneys who specialize in Intellectual Property (IP) and were recommended by a trusted business friend of mine.

1. Nequosha Anderson
Natasha is the Founder and Managing Attorney at Anderson Law Firm PLLC, a licensed attorney based in Central Florida.

2. Obi Ikeme
Ikeme Law, LLC is a full-service firm focused on all aspects of Immigration and Trademark law. Based in Houston, TX.